


If you’ve been wondering how to turn on noise canceling on AirPods, you’ll be glad to know it’s quick, simple, and makes a huge difference in how you listen. Whether you own AirPods Pro, AirPods Max, or the AirPods 4 with ANC, Apple gives you several ways to block out distractions — from a quick press on the earbuds, to voice commands with Siri, to on-screen controls in iOS.
In this guide, we’ll cover every method step by step, explain when to use Transparency Mode instead, and share a few pro tips to keep your AirPods performing at their best. For example, if noise cancelation doesn’t sound as strong as it should, sometimes the issue is with the mics themselves — in that case, a quick refresh like cleaning the AirPods microphone can make a big difference. And if you’ve ever felt like your AirPods still aren’t loud enough even with ANC on, here are a few ways to boost the volume safely.
By the end, you won’t just know how to activate noise cancelation, you’ll also know how to get the very best sound quality and performance out of your AirPods, no matter where you are.
Quick Answer: To turn on noise canceling on AirPods, press and hold the force sensor on the stem (AirPods Pro/4) or the Noise Control button on the right ear cup (AirPods Max) until you hear a chime. You can also switch modes in Control Center on iPhone/iPad or by asking Siri.
Table of Contents Show
How to turn on noise canceling on AirPods
Noise cancelation is one of the main reasons people choose AirPods Pro or the newer AirPods 4 with ANC — it shuts out the world so you can actually enjoy your music, audiobook, or podcast without distractions. The good news? Turning it on is quick and doesn’t require digging through complicated settings.
The simplest method is built right into the earbuds themselves. Here’s how it works:
- Put your AirPods in your ears.
- On the stem of either AirPod, press and hold the force sensor (that small flat area on the side).
- After a second or two, you’ll hear a soft chime, that’s your cue that noise cancelation has been activated.
From here, your AirPods will automatically switch between Active Noise Cancellation and Transparency Mode, depending on how long you hold the sensor. This makes it easy to tune out the noise when you need focus, or let sound back in when you want to stay aware of your surroundings.
Keep in mind: this shortcut doesn’t completely turn noise control off — it only lets you toggle between the two listening modes. If you’d rather disable ANC entirely, don’t worry. We’ll cover the other methods next.
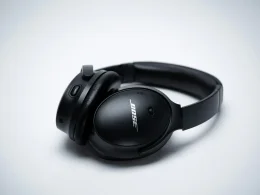
How to Turn On Noise Canceling on AirPods Max
The AirPods Max are Apple’s most advanced headphones, and the noise cancelation they deliver is on another level compared to in-ear models. Thanks to the over-ear design and a tight acoustic seal, you get a richer, more immersive experience that makes a busy café, airplane cabin, or noisy commute fade into the background.
Switching modes is refreshingly simple:
- Put on your AirPods Max.
- On the right ear cup, locate the flat silver Noise Control button in front of the Digital Crown.
- Press it once to move between Active Noise Cancellation and Transparency Mode.
That’s it — a single press gives you control over how much of the outside world you let in.
Helpful tip: If you also use your headphones with a Windows device, make sure they’re properly paired before trying to adjust noise settings. You can follow this step-by-step guide on using AirPods Max with a PC to get everything set up smoothly.
How to Turn On Noise Canceling from Siri
One of the best parts about using AirPods is not having to touch anything when you don’t want to. With Siri, you can control noise cancelation completely hands-free — perfect for when you’re driving, working out, or even just carrying groceries.
All you need to say is:
- “Hey Siri, turn on noise cancellation.”
Siri will instantly activate ANC for you. And if you’d like to change modes, just ask:
- “Hey Siri, switch to Transparency Mode.”
- “Hey Siri, turn off noise cancellation.”
That’s it — no buttons, no menus, just your voice.
How to Turn On Noise Canceling on AirPods from an iPhone or iPad
If you don’t like messing with the tiny sensors on your AirPods, you’re not alone. A lot of people prefer using their iPhone or iPad to manage settings, and the good news is that Apple makes it really simple. With just a couple of taps in Control Center, you can switch between Noise Cancellation, Transparency Mode, or Off without ever touching the earbuds.
Here’s how:
- Connect your AirPods to your iPhone or iPad.
- Swipe down from the top-right corner of the screen to open Control Center.
- Press and hold the volume slider (you’ll see your AirPods icon when they’re connected).
- Tap the Noise Control button in the bottom-left corner.
- Choose the mode you want: Noise Cancellation, Transparency, or Off.
That’s it, fast, visual, and reliable. The nice thing about using your device is that you get the full set of options, including the ability to completely switch noise control off, which isn’t possible if you’re only using the AirPods’ stem controls.
Quick tip: If you also like using your AirPods while working on a computer, you’ll want to make sure they’re paired correctly there too. Here’s a simple walkthrough on using AirPods with a laptop so you can easily manage your listening modes across devices.
How to Turn Off Noise Control on AirPods
Noise control is one of the best features of AirPods Pro and AirPods Max, but there are times when you don’t actually want it on. Maybe you’re in a quiet room, maybe you want to save battery, or maybe you just prefer listening without any digital filtering. Whatever the reason, you can easily turn off noise control on your AirPods, you just need to know where to look.
Turn Off Noise Control from Settings
By default, your AirPods only switch between Noise Cancellation and Transparency Mode when you press the stem. To add “Off” as an option:
- Open the Settings app on your iPhone or iPad.
- Tap Bluetooth, then tap the (i) icon next to your AirPods.
- Scroll to Press and Hold AirPods.
- Under Noise Control, select Off as one of the options.
From now on, pressing and holding the stem will cycle through Noise Cancellation, Transparency, and Off.
Turn Off Noise Control from Control Center
- Make sure your AirPods are connected.
- Swipe down from the top-right corner of your iPhone or iPad to open Control Center.
- Press and hold the volume slider (look for the AirPods icon).
- Tap the Noise Control button and choose Off.
Turn Off Noise Control with Siri
For a completely hands-free option, just say:
- “Hey Siri, turn off noise cancellation.”
Siri will instantly disable ANC for you without needing to touch your phone or earbuds.
FAQs:
Why doesn’t noise canceling block all sounds?
Noise cancelation works best on steady, low-frequency sounds like airplane engines or AC units. It won’t fully cancel sudden or sharp noises, such as clapping or shouting.
That’s because ANC technology relies on creating “anti-noise” for predictable sounds. For unexpected ones, your ear still picks them up. If it feels weaker than before, check the fit of your earbuds or headphones — a poor seal can let outside sound leak in. Build-up inside the speakers can also reduce effectiveness, so keeping your AirPods clear of earwax and debris is important.
Do all AirPods come with noise cancelation?
No. Only certain models support ANC:
- AirPods Pro (1st & 2nd Gen)
- AirPods Max
- AirPods 4 with ANC (Apple also sells a non-ANC version)
Regular AirPods do not include noise canceling.
Why won’t noise cancelation turn on for my AirPods?
If ANC won’t activate, try these quick checks:
- Make sure your AirPods are connected and updated to the latest firmware.
- On AirPods Pro, check the Ear Tip Fit Test in Settings for a proper seal.
- Confirm “Noise Control” options are enabled in Bluetooth settings.
- Restart your device and re-pair your AirPods if needed.
If none of that works, it may be a hardware issue — at that point, contacting Apple Support is the next step.