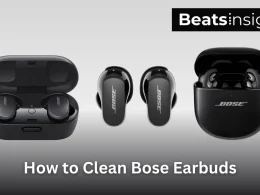


AirPods and AirPods Pro 2 can lose clarity fast when the mic ports collect pocket dust, dried sweat, or lint from the case. The symptoms are usually the same: callers say you sound faint, cut off, or like you’re speaking from across the room. Before assuming a hardware issue, it’s worth clearing anything sitting on the mesh and checking for moisture, since even a small amount can block the openings. If you’ve dealt with that before, this simple moisture fix can help you confirm whether liquid is part of the problem. Once the ports are clear, the mic performance usually snaps back immediately.
Quick Answer
To clean the AirPods microphone, clear any dust or buildup from the mesh using a dry, soft brush and wipe the surrounding area with a lint-free cloth. Make sure the openings are completely unobstructed so your voice comes through clearly on calls. Avoid moisture or sharp tools that could push debris deeper.
Why the AirPods Microphone Gets Blocked
The microphone openings on AirPods and AirPods Pro 2 sit close to the mesh vents, which makes them more vulnerable to small particles than most people realize. Lint from pockets, residue from skin oils, and dried sweat can settle over the mesh and narrow the airflow path. Even light moisture from a workout or brief exposure to steam can leave a thin film that affects how the mic picks up your voice. When this happens, callers usually hear you cutting in and out, or the mic sounds distant even at normal speaking volume. Clearing this obstruction first is the most reliable way to confirm whether the issue is simple buildup or an actual hardware fault.
How to Clean the AirPods Microphone (Step-by-Step)
Locate the Microphone Ports on AirPods and AirPods Pro 2
On AirPods, the primary mic sits on the stem’s lower edge, right behind the small circular mesh. AirPods Pro 2 place their main voice mic at the same location, with additional vents on the side for noise control. Make sure you’re working on the bottom-facing mesh, not the speaker grille on the top of the bud.
Clear Loose Debris First
Apple advises using only dry tools and light contact when cleaning any AirPods surface, so the steps below follow that same method to avoid damaging the microphone membrane.
- Hold the AirPod with the mic facing upward.
- Use a dry, soft-bristled brush to lift dust and pocket lint off the mesh.
- Brush in short, light strokes—no pressure.
- Wipe around the mic opening with a lint-free cloth.
- Check the mesh under a bright light to make sure nothing is sitting on the surface.
Clean the Microphone Mesh Thoroughly
- Keep the AirPod steady so you don’t push debris deeper.
- Use the brush to work around the edge of the mesh where grime collects.
- Break up any residue with light, repeated brushing instead of digging or scraping.
- Avoid toothpicks, metal tools, liquids, or compressed air—these can damage the membrane behind the mesh.
- Inspect the surface again; the grille should look fully exposed, not hazy or coated.
Remove Moisture from the Microphone Area
- Gently wipe the stem and mic opening with a dry microfiber cloth.
- Leave the AirPods in a cool, dry area for 15–30 minutes.
- If they were exposed to sweat, rain, or steam, give them extra time so any thin moisture film can clear from the mesh.
- Do not use heat, rice, or airflow to speed this up—those methods create more problems than they solve.
Test the Microphone After Cleaning
- Open Voice Memos on your iPhone and record a short clip at normal speaking volume.
- Play it back and check for clarity, background noise behavior, and volume consistency.
- Make a quick call or use an app with live mic feedback to confirm the issue is resolved.
- If the mic still sounds faint or distant, the obstruction is either deeper in the mesh or unrelated to debris—your next section will cover advanced fixes.
Advanced Fixes if Cleaning Doesn’t Help
Make Sure the Active Microphone Isn’t Switched to One Side
AirPods use a beamforming mic array, and the system selects either the left or right mic as the primary input. If one stem has reduced airflow or a weaker internal mic, the array collapses and your voice sounds faint. Go to Settings > Bluetooth > your AirPods > Microphone and switch between “Left,” “Right,” and “Automatically Switch.” If the issue disappears on one side, you’ve isolated the failing mic.
Reset the Bluetooth Connection Completely
Corrupted Bluetooth metadata can break the SCO/HFP call profile, which causes distortion, gating, and intermittent mic cutouts. In Settings > Bluetooth, select your AirPods and tap “Forget This Device,” then restart the iPhone. Pair the AirPods again as new. This forces iOS to rebuild the entire connection stack, restoring proper routing for the microphone channel.
Update AirPods Firmware
Firmware updates adjust DSP tuning, mic gain behavior, noise control thresholds, and beamforming logic. If you need a refresher on checking the current version or triggering an update manually, you can follow the steps in our dedicated firmware walkthrough, which explains how AirPods handle background installations. Keep the AirPods in their case, connect the case to power, and leave them beside your iPhone for several minutes. With the lid closed, iOS will automatically check for and install the latest firmware. Updated units often recover from clipping, gating, or distant-sounding audio.
Disable Noise Features That Can Interfere With Calls
Voice Isolation, ambient noise reduction, and third-party audio effects can gate your voice if the thresholds are too aggressive. During a call, open Control Center and check Mic Mode. Compare Standard, Voice Isolation, and Wide Spectrum. If one mode suppresses your voice or cuts syllables, stay on the setting that provides the most stable pickup.
Check for Case Obstruction Around the Mic Area
The lower stem mic sits close to the stem channel inside the charging case. If lint or compacted dust builds up in that channel, it can sit directly against the mic port whenever the AirPods are stored. Inspect the inside of the case and remove any debris using a dry, soft brush. This restores a clear airflow path to the lower mesh.
Test the Microphone on a Second Device
Pair the AirPods with another iPhone, iPad, or Mac and run a short voice test. If the microphone works normally on the second device, the issue is software-side on the original phone. If the distortion appears on every device, the problem is inside the AirPods themselves—either the lower mic assembly or the internal mesh layer behind the grille.
Reset AirPods to Factory Settings
This reset clears the internal pairing state machine, which controls mic routing, mode switching, and DSP behavior. Hold the button on the case until the LED flashes amber, then white. Pair the AirPods again. If the mic becomes clear after this reset, the issue was software-related rather than physical obstruction.
When the Microphone Is Actually Defective
If the mic remains faint, distant, or unstable after cleaning, firmware updates, resets, and device testing, the lower microphone capsule is likely failing or the internal mesh is blocked beyond surface access. AirPods under warranty are usually replaced outright. Out-of-warranty units may qualify for paid replacement depending on model and condition.
How to Test Your AirPods Microphone After Fixing
Use Voice Memos for a Direct Mic Check
Record a short clip in Voice Memos while speaking at a normal volume. Play it back through the phone speaker. A working mic should sound clear, even, and stable with no gating or sudden drops. This test bypasses call compression and noise processing, so any distortion you hear here reflects the actual microphone hardware.
Test the Mic During a Call
Make a quick call and speak steadily. If your voice cuts out only during calls but not in Voice Memos, the issue is in the call audio path (HFP/SCO profile), not the AirPods hardware. Switching Mic Mode between Standard and Voice Isolation can immediately confirm whether noise gating was suppressing your voice.
Test Mic Behavior in a Third-Party App
Record a short voice note in WhatsApp, Telegram, or Discord. These apps use different gain levels and noise filters. If the mic sounds clean in these tests but not on normal phone calls, your AirPods are fine and the issue is limited to the phone’s call-processing pipeline.
Compare Left and Right Mic Pickup
Switch the active microphone in Settings > Bluetooth > your AirPods > Microphone. Record a Voice Memos sample on each side. If one stem sounds noticeably quieter, more distant, or has more background hiss, the beamforming array is defaulting to the weaker mic — confirming a hardware issue on that side.
Test on a Second Device
Pair the AirPods with another iPhone, iPad, or Mac and repeat the Voice Memos test. If the distortion remains identical across every device, the microphone capsule or internal mesh is blocked or failing. If the issue disappears, it was software-specific on the original device.
Run a Quick Tap Test on the Mic Port
Lightly tap near the lower mic port while recording a Voice Memo. The mic should register faint, consistent taps. If the taps sound uneven, faint, or don’t register at all on one side, the primary mic on that stem isn’t responding correctly and likely requires service.
What a Successful Mic Test Should Sound Like
A healthy AirPods or AirPods Pro 2 microphone produces a stable, present tone with no muffling, no dropouts, and no aggressive gating. If you pass all tests, your microphone is functioning normally and no further troubleshooting is needed.
FAQs about cleaning AirPods microphone
The lower stem mesh is likely obstructed by dust, pocket lint, dried sweat, or a thin moisture film. These restrict the airflow path to the mic capsule and weaken voice pickup. Once the mesh is fully cleared, your voice should sound normal again in Voice Memos.
Both models use a primary microphone on the bottom of the stem, behind the circular mesh. AirPods Pro also have outer and inner vents for noise control, but the lower stem mic is the one responsible for call audio and voice pickup.
No. Alcohol can seep through the mesh and damage the microphone capsule. If needed, use alcohol only on a cloth for wiping the plastic housing—never on the mic grille or any openings.
Yes. Compressed air can force debris behind the mesh, stress the internal membrane, and damage seals around the mic port. Apple explicitly advises against using compressed air on any AirPods openings.
Clean the mic when call clarity drops or when the mesh looks hazy, coated, or dull. Most users need to clean it every one to three weeks depending on pocket lint, sweat exposure, and daily usage. If you use silicone tips, replacing them periodically can also help maintain consistent airflow and voice pickup; we’ve outlined how to do that in our ear-tip replacement guide.
If the mic remains faint after cleaning, the issue is typically firmware behavior, Bluetooth routing corruption, or a failing mic capsule. Additional scrubbing won’t fix hardware-level problems. Test each stem individually and try a full reset to confirm the cause.
Check the active microphone setting, reset the Bluetooth connection, update the firmware, and test the mic on another device. If the muffling persists in all tests, the internal mesh or mic capsule is compromised and the AirPods need service or replacement.
Record a clip in Voice Memos, compare left and right mic pickup, and repeat the test on a second device. If both stems sound faint or distorted in every test—and the tap test produces little or no response the microphone assembly is defective.
Earwax rarely blocks the microphone ports because they sit on the stem, not inside the ear canal. It typically affects the speaker vents instead. If you see buildup around the speaker area, use a safe cleaning method to remove it.