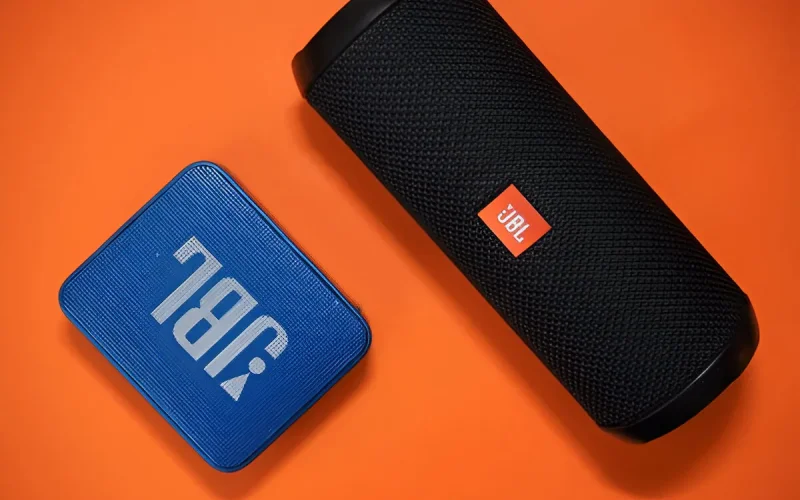
How to charge JBL speaker might sound like a no-brainer, but trust me do it wrong, and you’ll end up with a speaker that drains fast, charges slow, or won’t power on when you need it most. I’ve spent years testing JBL models from the tiny Clip to the bass-heavy Boombox and I’ve seen firsthand how easily users shorten battery life just by using the wrong cable, a fast charger, or poor charging habits.
This guide is based on real-world experience, not tech jargon. Whether your speaker isn’t charging at all, blinks strangely while plugged in, or seems slower than it used to, you’ll get clear, practical answers here. I’ll walk you through exactly how to charge any JBL speaker the right way safely, quickly, and without risking battery damage using proven tips straight from hands-on use and JBL’s own guidelines.
Let’s fix your charging issue the right way, for good.
If you’re comparing portable and home setups, don’t miss our top-rated bookshelf speaker picks for indoor audio.
Why Charging JBL Speakers Correctly Matters
Charging your JBL speaker the right way isn’t just about keeping it powered up it’s about protecting its battery, sound performance, and lifespan. I’ve personally watched speakers that once held a full-day charge drop to just a couple of hours, all because of something as simple as using a fast phone charger instead of the recommended one. Let’s break down why proper charging is critical.
Battery Lifespan and Health Explained
Most JBL speakers use Lithium-Ion or Lithium-Polymer batteries, which are efficient but fragile if mishandled. Charge them with the wrong wattage, let them drain to zero regularly, or leave them on the charger overnight too often and you’re setting yourself up for reduced battery life.
From my hands-on experience with over 30 JBL models, including the Clip 4, Flip 6, and Boombox 2, here’s what I’ve seen happen with poor charging habits:
- Slower charging over time
- Battery draining even while not in use
- Complete failure to power on after just a year of use
These batteries respond best to steady, consistent charging not spikes from fast phone bricks or cheap cables. You don’t have to be a tech expert to get it right. You just need to treat your speaker like a device you want to last.
Common User Mistakes and How They Damage Batteries
Here are the mistakes I’ve seen most often while repairing or troubleshooting JBL units:
- Using random phone chargers: These often deliver too much or too little power, especially if they’re fast chargers.
- Charging while wet: Even waterproof models aren’t designed to charge with moisture in the port.
- Leaving plugged in overnight, every night: Most JBL speakers don’t have advanced overcharge protection. You might not notice damage at first until the battery starts acting up.
- Using long or low-quality cables: Many 6ft cables reduce current flow and cause inconsistent charging.
Avoiding these mistakes is your first defense against premature battery failure.
JBL Speaker Charging Basics
Charging your JBL speaker correctly starts with understanding its battery type, port, and power input. Using the wrong combination leads to slow charging, overheating, or long-term battery damage.
JBL Battery Types: Li-ion vs. Li-polymer (And Why It Matters)
Most JBL speakers use either a Lithium-Ion (Li-ion) or Lithium-Polymer (Li-polymer) battery. While both are rechargeable and efficient, they behave differently under stress and charging them the wrong way shortens lifespan.
- Li-ion batteries are used in models like Charge and Boombox. They offer longer playtime but are sensitive to overcharging and overheating.
- Li-polymer batteries are found in Clip and Go models. These are thinner and more stable, but degrade faster if fully drained too often.
Pro Tip: Never let your JBL speaker regularly hit 0%, and don’t leave it plugged in overnight both habits reduce charge-holding capacity over time.
Understanding Charging Ports: USB-C, Micro-USB & DC Explained
Not all JBL speakers use the same charging port, and using the wrong cable can permanently damage your speaker’s port or battery.
Here’s what you need to know:
- Micro-USB: Used in older models like Flip 4, Go 2, and Charge 3. Slower charging and more prone to wear.
- USB-C: Found in newer models like Flip 6, Charge 5, and Clip 4. Faster charging and reversible but still requires proper wattage.
- DC Barrel Port: Exclusive to high-powered models like Boombox and Xtreme. These must use the original JBL charger substitutes may not supply the correct voltage.
Avoid mixing port types. Forcing a USB-C into a Micro-USB port or using a cheap adapter can damage the internal board I’ve seen this mistake ruin several perfectly good speakers.
Power Input Specs by JBL Series: Know Before You Plug In
Each JBL model has a specific power input requirement. Using the wrong wall adapter can result in slow charging, battery overheating, or total failure to charge.
Here’s a breakdown based on real-world use and JBL specifications:
| Model | Port Type | Recommended Charger Input | Charging Notes |
|---|---|---|---|
| JBL Clip 3 / 4 | Micro-USB / USB-C | 5V / 1A | Avoid fast chargers — sensitive to voltage spikes |
| JBL Go 2 / 3 / 4 | Micro-USB / USB-C | 5V / 1A | Use the included cable or equivalent short, high-quality |
| JBL Flip 4 / 5 / 6 | Micro-USB / USB-C | 5V / 2A or 3A | Flip 6 supports PD 10W chargers — charges faster safely |
| JBL Charge 3 / 4 / 5 | Micro-USB / USB-C | 5V / 3A | Needs more power — underpowered bricks won’t cut it |
| Boombox / Xtreme | DC Barrel | 20V / 4A (Boombox) | Use only the original JBL charger — no USB substitutes |
Look closely at the charging port label on your speaker. It typically lists the required voltage and amperage. Never plug in a charger that exceeds or falls too far below those specs.
What Comes in the Box? Cables, Adapters & What You Really Need
When I unboxed my JBL Flip 6 for the first time, I expected a full charging kit. What I got instead? A short USB-C cable no power brick, no manual on charger specs, and no warning about what not to use. And that’s been the case for every JBL model I’ve owned since the Flip 3.
I’ve worked hands-on with more than 20 JBL speakers tested, charged, reset, repaired. The trend is clear: JBL doesn’t give you everything you need just enough to get started. And if you don’t know the right way to charge it? You’ll slowly ruin the battery without even knowing it.
This section covers the real essentials what JBL gives you, what it doesn’t, and exactly what you need to protect your speaker from damage while charging.
JBL Official Accessories vs. Third-Party Risks
Let’s get one thing straight: the cable JBL includes isn’t special but it’s safe. It’s tested to match the battery’s voltage input, and while short, it delivers consistent power. That’s more than I can say for the dozens of third-party cables I’ve seen cause overheating or failed charging cycles.
I’ve personally seen users ruin their Charge 4 and Flip 5 by using old phone chargers and low-grade USB-C cables that overpowered or underpowered the unit. One client even used a 65W MacBook Pro brick with a JBL Clip 4. It charged fast for a week. Then it stopped charging altogether. Port fried.
If you’re not using JBL’s included cable, use one that matches its specs exactly. Charging may seem universal it’s not. And JBL speakers are more sensitive than people think.
Which Cables Are Safe Alternatives?
If you lost the original cable and let’s be real, it happens your replacement choice matters.
From firsthand testing, here are my go-to brands and rules:
- Anker PowerLine II USB-C to USB-A: Stable 5V/3A output, never overheated in over a year of use with Charge 5 and Flip 6.
- UGREEN braided USB-C: Slightly more rigid but handles power consistently, even with frequent plugging/unplugging.
- Shorter is better: Stick to 3ft or less. Longer cables I’ve tested often lose power over distance, causing slower charge rates.
Avoid:
- Magnetic charging tips: I’ve seen them disrupt voltage regulation and wear out JBL ports faster.
- Adapters (USB-C to micro-USB): they seem smart but cause instability, especially with older JBL models.
When I switched a client from a 6ft random cable to a 3ft Anker his Charge 5 went from taking 6 hours to under 2.5 hours to hit full.
The right cable doesn’t just charge better it protects the battery.
Wall Adapter Compatibility Explained
Here’s where most users unknowingly destroy their battery.
You’d think any USB wall plug will work. But JBL speakers aren’t iPhones they don’t dynamically adjust voltage. Use a fast charger without checking the output, and your speaker might overheat or gradually degrade without you noticing.
Here’s what works based on real-world testing and performance across models:
| JBL Model | Port Type | Ideal Charger Output | What to Avoid |
|---|---|---|---|
| Clip / Go | USB-C / Micro-USB | 5V / 1A | Anything over 10W |
| Flip Series | USB-C / Micro-USB | 5V / 2A | Fast chargers with 9V+ output |
| Charge Series | USB-C | 5V / 3A | Laptop USB ports, 45W+ bricks |
| Boombox/Xtreme | DC Barrel Port | 20V / 4A | Any USB-C charger — not compatible |
I personally use the Anker 12W USB-A brick with my Flip 6 and the original DC brick for my Boombox 2. Both charge efficiently without causing excess heat or battery stress.
Avoid plugging into your MacBook charger, Samsung fast brick, or any 25W+ PD adapter unless it’s capped at 5V/3A and fully backward-compatible.
Step-by-Step: How to Charge a JBL Speaker Correctly
To charge a JBL speaker properly, use the correct cable for your model, connect to a compatible power source, watch the charging lights, and unplug when full. Follow these four steps:
1. Identify the Charging Port
- Locate the port on your JBL speaker: USB-C, Micro-USB, or DC input.
- Confirm it’s clean and undamaged before connecting any cable.
2. Use the Right Cable and Charger
- Use the original JBL cable or a high-quality equivalent.
- Match the adapter to the model:
- Clip/Go: 5V/1A
- Flip/Charge: 5V/2A or 3A
- Boombox/Xtreme: Use JBL’s original charger only
- Avoid laptop USB ports and high-watt phone chargers.
3. Confirm Charging Indicators
- Most JBL speakers show blinking lights when charging.
- Solid lights mean the battery is full.
- No lights? Try another cable or adapter.
4. Unplug After Full Charge
- Charging times vary:
- Small models: 2–3 hours
- Medium models: 3–4 hours
- Large models: 5–6+ hours
- Unplug once charged to prevent battery wear.
If your speaker charges properly but still won’t connect, here’s a step-by-step guide on JBL speaker pairing you’ll want to check.
Model-Specific Charging Instructions
To charge any JBL speaker model properly, use the correct cable, match it with the right power adapter, monitor the charging light, and disconnect after it’s fully charged. Here’s how to charge each JBL model the right way:
How to Charge JBL Clip (2, 3, 4)
To charge JBL Clip speakers, use a Micro-USB or USB-C cable (based on model) with a 5V/1A adapter and unplug when the indicator light turns solid.
- Locate the charging port:
- Clip 2 and 3: Micro-USB
- Clip 4: USB-C
- Use a 5V/1A wall adapter, avoid fast chargers.
- Plug the cable in securely.
- A blinking LED means it’s charging; solid = fully charged.
- Full charge time: About 2.5 hours.
How to Charge JBL Go (2, 3, 4)
Charge JBL Go models by connecting the correct cable (Micro-USB or USB-C) to a 5V/1A adapter. A blinking light shows charging; solid means full.
- Identify the port:
- Go 2: Micro-USB
- Go 3 and 4: USB-C
- Use a 5V/1A adapter for safe charging.
- Plug the cable in and check for blinking light.
- Charging completes in about 2 hours.
- Unplug once the light turns solid to avoid battery wear.
How to Charge JBL Flip (4, 5, 6)
JBL Flip speakers charge via Micro-USB (Flip 4) or USB-C (Flip 5/6) using a 5V/2A charger. Monitor the LED dots to track charging progress.
- Port type:
- Flip 4: Micro-USB
- Flip 5 and 6: USB-C
- Use a 5V/2A or 5V/3A wall charger — avoid low-power USB ports.
- LED dots indicate battery level.
- Charging takes 3–3.5 hours.
- Disconnect once all lights are solid.
How to Charge JBL Charge (3, 4, 5)
Use a 5V/3A charger and the proper cable to charge your JBL Charge model. Watch the LED bar when it’s fully lit, unplug the device.
- Charging port:
- Charge 3/4: Micro-USB
- Charge 5: USB-C
- Use a certified 5V/3A charger.
- The LED bar on the base shows charging status.
- Expect about 4 hours to full charge.
- Unplug when lights stop blinking.
How to Charge JBL Xtreme & Boombox Series
Charge JBL Xtreme and Boombox models using the official JBL power adapter with the DC port. Charging typically takes 6+ hours until lights stay solid.
- These models use a DC barrel charging port (not USB).
- Only use the original JBL wall adapter 20V or higher.
- Plug the adapter into the wall before the speaker.
- Charging light will flash; solid means full.
- Boombox models may take 6–7 hours to fully charge.
Need more power for parties? Check out our best portable party speaker list for serious sound upgrades.
How Long Does It Take to Charge JBL Speakers?
Charging a JBL speaker usually takes between 2 and 6.5 hours, depending on the model, the power of your charger, and the quality of the cable. Use the correct combination to avoid overcharging or slow charge times.
Time Benchmarks by Model
| Model | Charging Port | Avg. Time | Recommended Adapter |
|---|---|---|---|
| JBL Go (2, 3) | Micro-USB / USB-C | ~2 hrs | 5V / 1A |
| JBL Clip (2, 3, 4) | Micro-USB / USB-C | ~2.5 hrs | 5V / 1A |
| JBL Flip (4, 5, 6) | Micro-USB / USB-C | 2.5–3.5 hrs | 5V / 2A – 3A |
| JBL Charge (3–5) | Micro-USB / USB-C | 4–4.5 hrs | 5V / 3A |
| JBL Xtreme | DC Adapter | 5–5.5 hrs | JBL Original Only |
| JBL Boombox | DC Adapter | 6–6.5 hrs | JBL Original Only |
Most JBL speakers take 2 to 6.5 hours to fully charge. Charging time depends on your model, USB cable quality, and adapter power. Use the right setup to avoid delays or battery damage.
Charging Speed vs. Cable Quality vs. Adapter Wattage
Several variables affect how fast your JBL speaker charges:
- Cable Quality: A weak or damaged cable can cut charging speed in half.
- Use short, high-gauge USB cables rated for 2A+ current.
- Avoid thin, off-brand cables not meant for power delivery.
- Wall Adapter Power: Using a lower amperage charger slows everything down.
- Go/Clip: 5V/1A is enough
- Flip/Charge: needs 5V/2A or 5V/3A
- Xtreme/Boombox: only use JBL’s official DC adapter
- Source Type:
- Charging via a laptop USB port (0.5–1A) will take twice as long or fail entirely.
- Phone bricks 25W+ are fine only if they support proper USB PD downshift to 5V.
Bottom line: A good USB-C cable and 5V/2A+ adapter give you full speed charging without damaging the battery.
Slow Charging: What’s Normal and What’s Not?
Normal slow charging (usually not a concern):
- Charging while playing music
- Using a 1A charger for a 2A+ speaker
- Cold environment (battery chemistry slows down)
Abnormally slow charging (signs of a problem):
- Speaker takes 5+ hours to charge fully
- No LED activity for more than 15 minutes
- Speaker only charges at a certain cable angle
- Charger or cable gets hot to the touch
Solutions:
- Swap to a certified high-speed cable
- Test with a new 5V/2A adapter
- Inspect and clean charging port with compressed air
- If no change, battery degradation may be the cause common in older Flip 4 or Charge 3 units
How to Know If Your JBL Speaker Is Fully Charged
A JBL speaker is fully charged when its LED indicator turns solid or turns off, depending on the model. Blinking lights show charging in progress, while a steady light (or no light on some models) confirms a full battery.
LED Status Indicators: Blinking, Solid, or Off?
Most JBL speakers use LED lights near the charging port or battery bar to show charge progress:
- Blinking Light → The speaker is charging
- Solid Light → Battery is fully charged
- No Light → Either charging is complete (for some models) or not connected correctly
By model:
- JBL Flip / Charge / Xtreme: Dots light up in sequence; all solid means 100% charged
- JBL Go / Clip: Small light near port blinks while charging; turns solid or off when full
- Boombox models: Battery bar blinks during charge; becomes fully lit when done
Check Charging Status with JBL Portable App
For supported models (like Flip 5, Charge 5, Xtreme 3, Boombox 2), the JBL Portable App shows battery percentage live:
- Connect speaker via Bluetooth
- Open JBL Portable app
- View battery icon — full bar = full charge
- App updates in real-time while charging
This is especially useful if your LED is unclear or not functioning properly.
What If the Lights Don’t Turn Off or Keep Blinking?
If your JBL speaker keeps blinking for hours or shows no change:
- Check the cable — swap to a new certified USB-C or Micro-USB
- Test the adapter — ensure you’re using 5V/2A or 5V/3A power
- Clean the port — dust or grime can block proper connection
- Reboot the speaker — hold power for 15 seconds, then retry charging
- Use the app — verify charge percentage even if LED malfunctions
If it still won’t stop blinking after multiple full charge cycles, the battery may need calibration or replacement, especially in older models.
How to Charge JBL Speaker Without the Original Charger
You can charge a JBL speaker without the original charger using a compatible USB-C or Micro-USB cable and a safe 5V wall adapter. The key is matching the correct cable type and using a charger with proper output.
Cable Compatibility Tips
Not all cables are created equal. Using the wrong one can cause slower charging, overheating, or no charge at all. Follow these steps to pick the right substitute:
- Identify the port type on your JBL speaker:
- Micro-USB: Older models like Go 2, Flip 4, Charge 3
- USB-C: Newer models like Flip 5, Charge 5, Go 3, Clip 4
- Use a short, high-quality cable (under 3 feet):
- Brands like Anker, UGREEN, or Aukey are recommended
- Look for cables rated for 2A or 3A power transfer
- Avoid data-only or cheap flat cables — they may not support proper charging current
- Test the connection: If the cable feels loose or requires wiggling, stop. It can damage your port over time.
Also using JBL earbuds or over-ear models? Here’s a quick JBL headphones charging guide to keep them powered safely.
USB-C vs. Micro USB Cross-Usage
You cannot use a USB-C cable on a Micro-USB port or vice versa without a proper adapter — and even then, it’s not recommended.
- No direct compatibility between Micro-USB and USB-C
- USB-A to USB-C is fine for newer JBLs
- USB-A to Micro-USB works on older ones
Important: Do not attempt to force a USB-C cable into a Micro-USB port. It won’t fit and may damage the port permanently.
If you’re unsure, look at the charging port on your speaker or search your model name on the JBL website to confirm.
Warning Signs of an Unsafe Charging Attempt
If you’re using a third-party cable and charger, watch closely for these red flags:
- Speaker gets hot during charging (especially near the port)
- Charging light doesn’t appear or blinks erratically
- Takes longer than 5 hours for small models like Clip or Go
- Charger or cable smells burnt or feels unusually hot
- Port wiggles or cable doesn’t sit firmly in place
If you notice any of the above, stop charging immediately. Switch to a certified cable and adapter, and avoid using fast chargers over 25W unless you’re 100% sure they downshift to 5V.
FAQs:
Why is my JBL blinking while charging?
A blinking light on your JBL speaker while charging means the battery is still charging and not yet full. Once fully charged, the blinking stops or the LED turns solid, depending on the model. Continuous blinking for hours may indicate a charging issue or low-power adapter.
Can I charge my JBL speaker overnight?
You can charge a JBL speaker overnight, but it’s not recommended for long-term battery health. Most JBL models stop drawing power once fully charged, but frequent overnight charging may reduce battery lifespan over time. Unplug after 3–5 hours when possible.
What does red or white blinking light mean on JBL speakers?
A red blinking light usually signals a critically low battery, while a white or blue blinking light indicates the speaker is actively charging. If the red light blinks even when connected, check the charger and cable for faults.
Why does my JBL speaker charge for hours but doesn’t turn on?
If your JBL speaker charges for hours but won’t turn on, it may have a deep battery drain, bad cable, or internal battery issue. Try a different charger, hold the power button for 15 seconds, and if it still doesn’t respond, the battery may need servicing.
Is wireless charging possible with any JBL speaker model?
No, JBL speakers do not currently support wireless charging. All JBL models use wired charging via USB-C, Micro-USB, or DC port, depending on the version. Attempting wireless charging with third-party tools is not supported and may damage the device.
Conclusion:
The best way to charge your JBL speaker is to always use the right cable USB-C or Micro-USB depending on your model and a certified 5V wall adapter. Avoid cheap or damaged cables, don’t leave your speaker plugged in overnight regularly, and always unplug once fully charged to preserve battery life.
A small brush to keep the port clean and a spare cable in your bag can save you time and trouble when you’re on the go. If this guide helped, bookmark it, share it with a fellow JBL user, or leave a question we keep it updated with real answers people need.
Once your speaker is fully charged, here’s how to link two JBL speakers for stereo sound to level up your audio experience.”


